Instax Strobe Kit Giveaway

CONTEST CLOSED! Thanks for your interest!
Instax Strobe Portrait Kit Giveaway!
To kick off 2020, I’m giving away a complete Instax Strobe Kit!
In 2019 one of the most popular pages on my website was the tutorial for using Off Camera Flash with an Instax instant camera, link right here:
Instax + LP180: Using off camera flash for your instant prints
You will get everything you need to create your own custom light for your instant portraits:
Instax Mini90 Camera + Pack of Instant Film
LumoPro LP180 Strobist Kit - Manual Flash Unit, Light Stand, Umbrella, Sync Cables, Carrying Case
Sekonic L-308x Flash Meter
How To Enter
To enter this giveaway is simple:
Enter your email and Instagram handle below (This is very important, some prize items are shipping directly from the partner, we need to be able to coordinate delivery)
Make sure you follow @danieltjester on instagram
Like the giveaway post: Click Here
Comment and tag TWO friends that you think would be interested in winning
A quick note:
We respect your privacy. Please note, by entering this giveaway, you agree to receive emails from me and from prize contributors like Sekonic (You can read their privacy policies by clicking the link)
Contest will close on Sunday January 12. Winner will be randomly selected from Instagram comments, notified via email, and announced on Instagram the week of Jan 13. Must be 18 or older and prize pack must be shipped to a US address to win.
Fake The Setting Sun with Off Camera Flash
My wonderful and beautiful wife Alesia from our maternity shoot for our third child Rockford. The sun had gone down behind some low clouds and foothills when we saw this patch of flowers. To recapture that sunset feel, I faked the setting sun with my LumoPro LP180 and a CTO gel.
I really like having light sources in frame. Or at the very least, shooting light towards my lens. When I’m shooting outside, I pretty much always try to shoot INTO the sun.
I know, it’s a little outside of some peoples understanding of the "rules" of photography.
I’ve tutored new photographers who think I’m crazy when I set up a portrait shooting into the sun. I just love it.
However, on more than one occasion I’ve been shooting away and the sun dips below the horizon. Or it was obscured by some low cloud cover. Or it was 1pm in July. Sometimes the sun isn’t where I need to it to be, in order for it to be visible behind my subject.
So, I fake it. Here are a few examples.
This was shot at approximately 1pm. The sun was obscured by tree canopy and we faked the setting sun with OCF.
This one is a little more subtle, just a very slight lightwash, from just out of frame.
Fake setting sun (the sun had already dipped below the ridge line and some low clouds). Note the placement at the edge of the frame and just above the distance hills.
This set up also included a reflector to bring some light back onto Blanca's face.
This set up is a little more in your face in a sense. This is designed to look like the sun coming through a gap in the tree coverage. The actual sun was higher up in the sky in roughly the same area.
You can achieve this look with a single speed light, a half or full CTO gel (gelled to taste), and a little know-how.
Step One: Understanding
The key thing to remember here is that the strobe is not your main light. This lighting method is the very essence of blending off camera flash with ambient light. In all except for one of the above examples, the ambient light is the main light and the “sun” light is kept relatively low output to blend in with the ambient exposure. Like the secret to a good haircut or a killer smoothie, its all in the blending.
Step Two: Expose Properly
Get your ambient exposure at or a little above where you want it. If you’re working on a close in portrait (chest, head, and shoulders) you can bounce light off a reflector and back into your subjects face. Overexposing the ambient light slightly will go a long way in making your strobe blend with the daylight.
This was the ambient for this shot. You will see we need to expose OVER this to help the strobe blend with the natural light.
This is a great example of the ambient light being too low and making your cone of fake sunlight obvious. Blend Blend Blend!
Step Three: Place and set your light
Get your CTO gelled flash in frame or JUST out of frame and set power output to your desired effect. play around with the blending of it until it looks natural.
We finally hit the goldilocks ratio of ambient and strobe. The result is a totally convincing setting sun.
Step Four: Realize this doesn’t always work
This is a little hard to explain, but there are a few situations where this just wont work. It will look fake and contrived. The most common situation is where there are a lot of objects between your flash and your subject. The cone of light is not sufficient to fake sunlight on all objects in the frame. You want to make sure that any objects aside from your subject are being hit by this fake sunlight also, otherwise it will just look really fake. Observe the image above, where our cone of light is obvious. It is a combination of underexposure of the ambient light, and the viewer seeing too many background elements that SHOULD be affected by the "sun" light, but aren't.
Step Five: Remove light stands in post (if necessary)
Whenever possible I hide light stands or use a LumoPro studio clamp to reduce the amount of post processing I have to deal with. In general however, it's not terribly difficult to remove a light stand in Photoshop.
Instax + LP180: Using off camera flash for your instant prints
The Fuji Instax camera is a really fun throwback to the days of Polaroid and instantly sharing analog prints with your friends. I've really enjoyed my Mini 80 over the last year or so, but I suddenly realized it had much more potential after a little bit of testing in my studio late one night.
I thought to myself: Can I improve the general photographic quality of the Instax print by building better lighting set ups? The camera has no PC sync jack or hot shoe, how can I trigger my strobes? Then it dawned on me. If I could redirect the on board flash and use that output to trigger the optical slave on my LumoPro LP180, I could override the camera flash and build much more interesting light for my fun little camera.
Here's how to do it.
Things You Will Need
- Your Instax camera
- A light meter
- A manual flash with optical slave (LumoPro LP180)
- A flag/reflector/foam core/grey card or some other means of redirecting the camera flash
- Light stand and modifier (if desired)
Things You Need To Know
- Instax film ISO is 800
- You will be using the On Board Flash to trigger the optical slave on the manual Off Camera Flash
- This tutorial is geared toward people who have the required equipment and a good understanding of Off Camera Flash use
Steps Overview
- Measure output from the Instax on board flash
- Create new light setup that matches output measured in step one
- Shoot away while carefully flagging the onboard camera flash
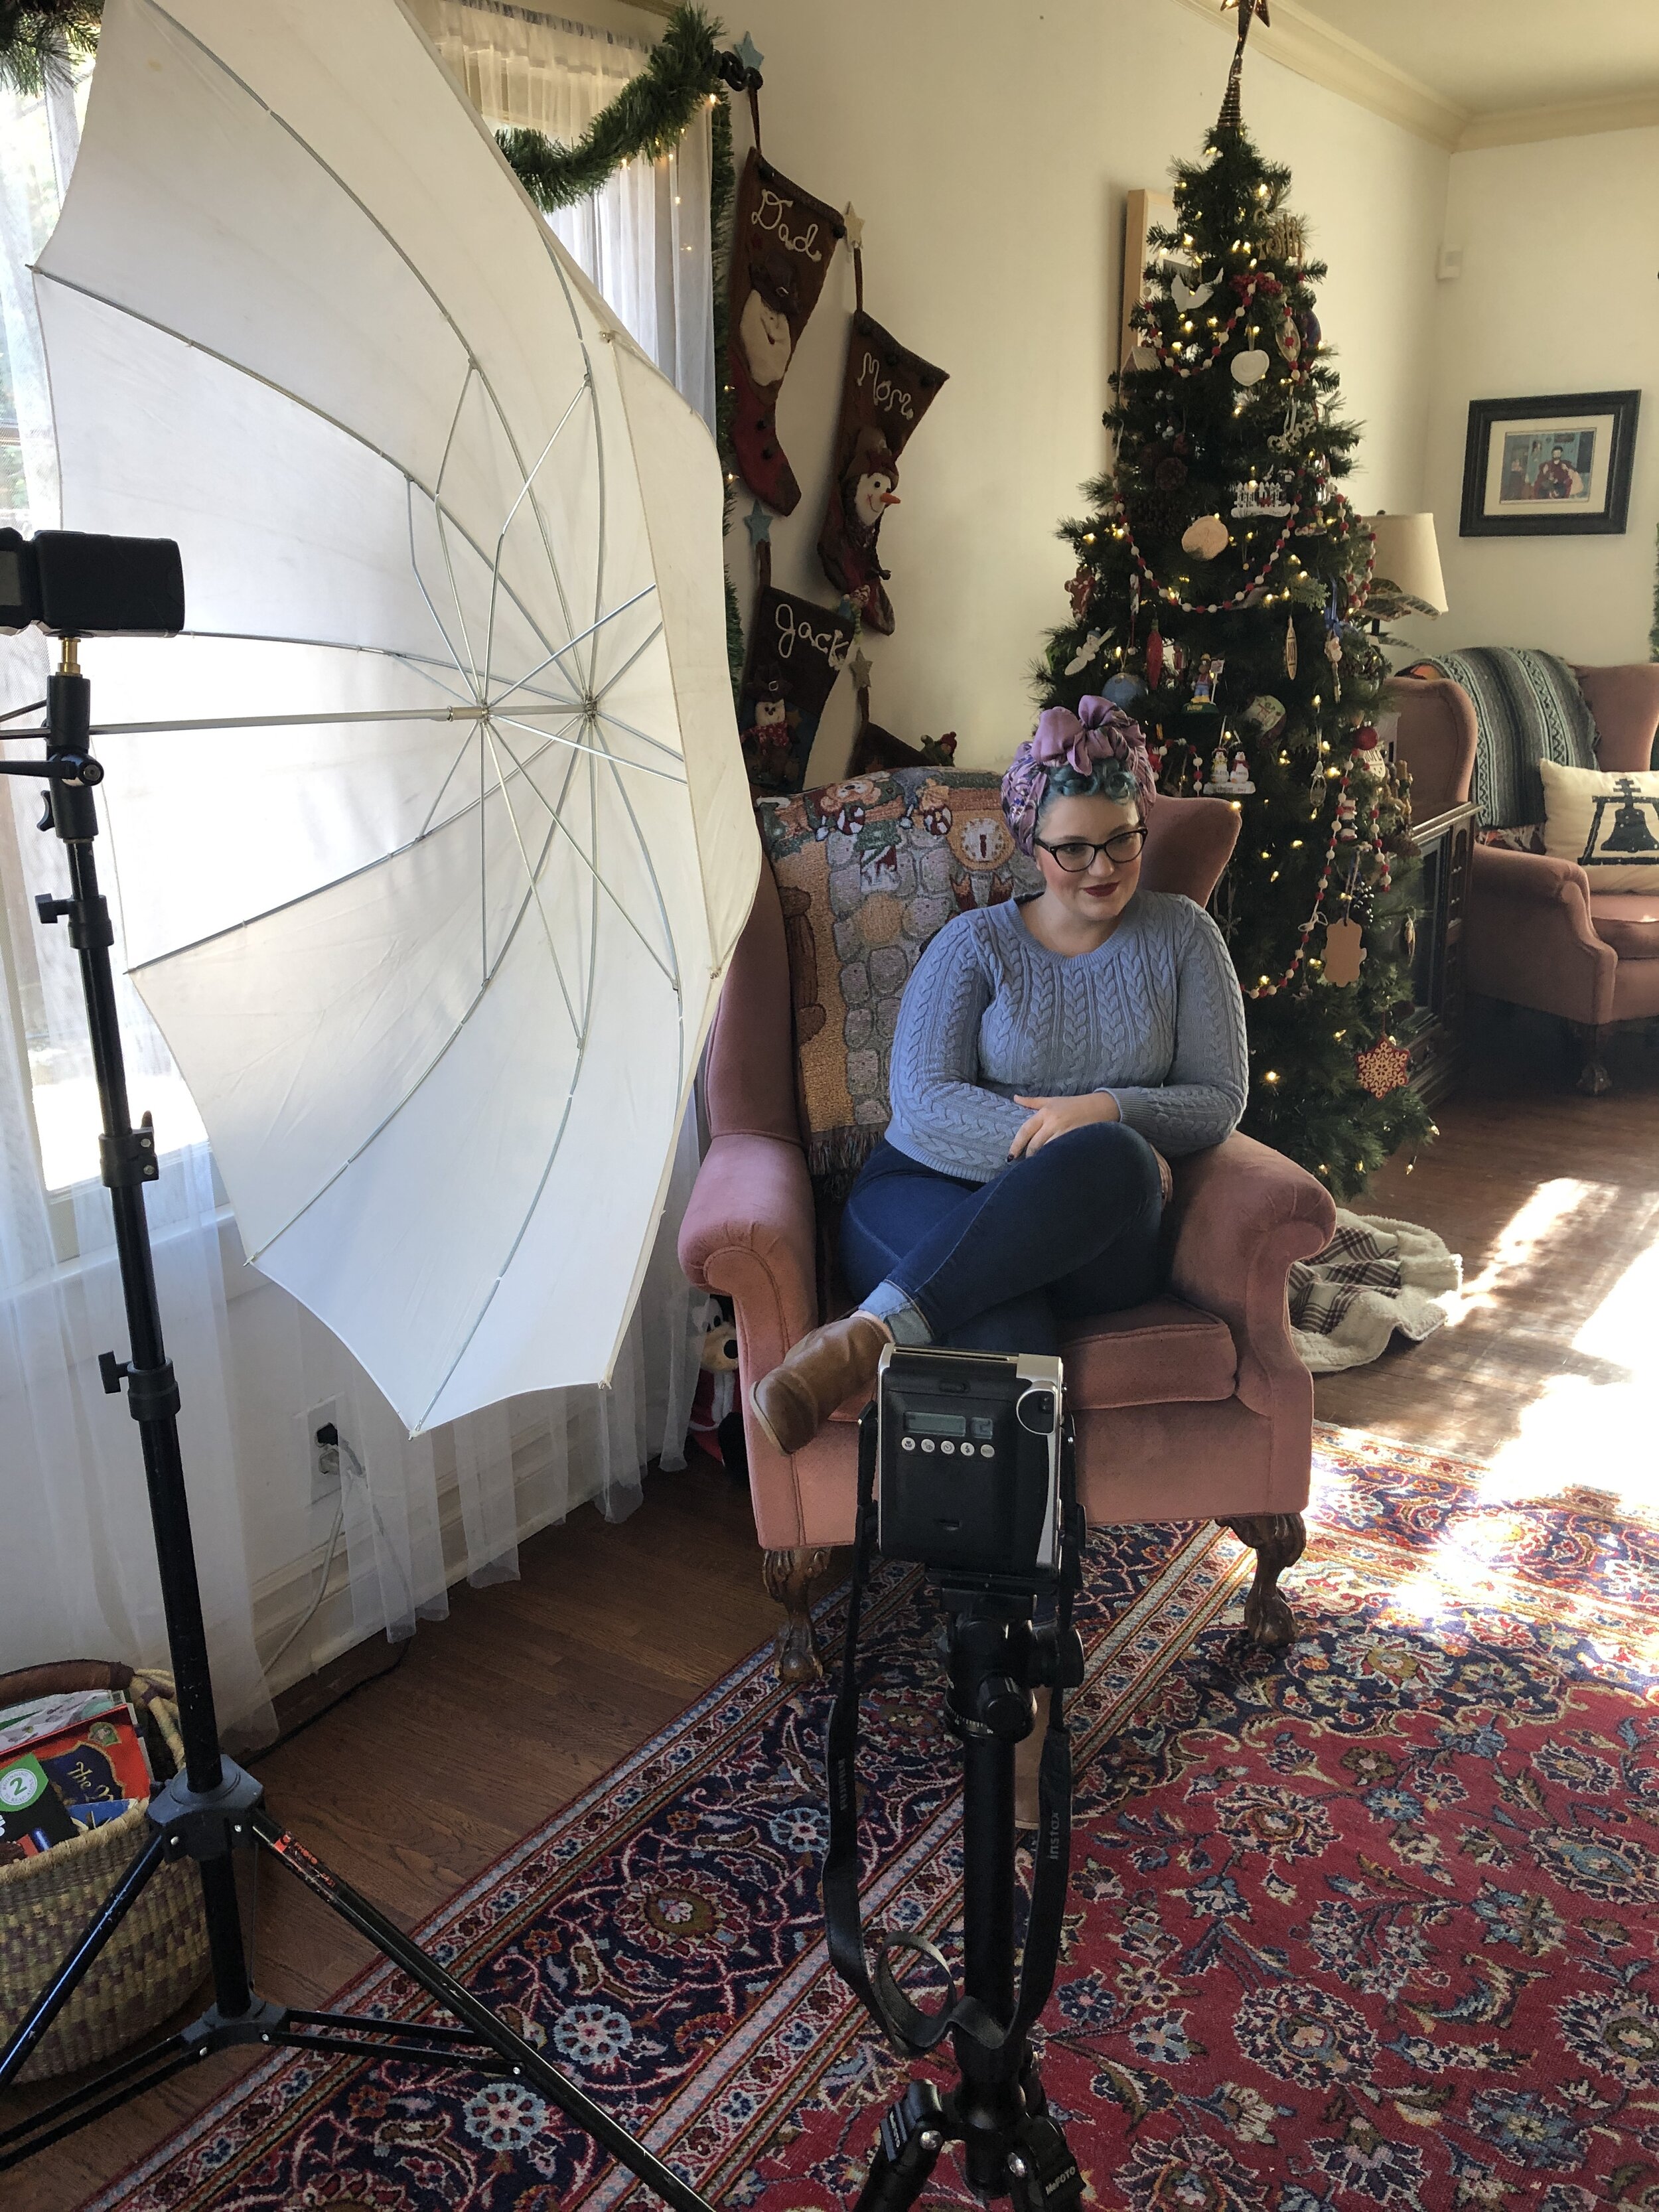
You will need your Instax, a light meter, and your Manual Off Camera Flash - You SHOULD be using the LumoPro LP180
You may also need a light modifier, if you so desire. Shown here is the LumoPro Small Softbox.
Step One: Determine your Instax output
Start by positioning your Instax in relation to your subject. You want to try to position the camera where you get the best results with the on board flash (referred to as "OBF"). I had mine about 3-4 feet away from Oxana, my studio assistant. Positioning the camera in the right place will allow you to meter the output that gives you the best results. The first time I set this up I remember the OBF reading about f8, this time it read f11, which was a little too hot, so I think f8 is about where the money is.
Setting up the Instax to read the light output on Oxana, my studio assistant.
Meter reading. Don't mind my knuckle reflection.
Now it's disclaimer time: I have no way of knowing if this is the right aperture for every Instax camera. While f8 is probably a good jumping off point, I encourage you to test on your own if you have the means to do so. Different studio set ups may yield different results. It's probably worth noting this was done in a pretty dark studio.
Test the output by setting your meter to flash detection mode and pop the OBF by triggering the shutter. You will probably want to do this with no film in the camera because Instax ain't cheap. If you keep an empty film cartridge, you can trick the instax into thinking it has film in it and it will allow you to trip the shutter and trigger the flash. Do this a couple of times to make sure you've got an accurate reading.
Once you have your meter reading, you can move on to step 2.
Step Two: Set your off camera flash to fire at the same output as your Instax
You have your meter reading, now it's time to set your OCF in your desired position and set the power to match the output of your Instax OBF. For anyone experienced in OCF, this step is not difficult at all, but there are some things to remember. First, make sure your LumoPro LP180 optical slave will be able to see the OBF from the Instax. Second, you can position your lights however you want, as long as the light hitting your subject matches the output of the Instax, your exposures will look great. You will also want to make sure your optical slave is set to trigger on the FIRST flash it sees. On the LumoPro LP180, this setting is S1. You will want to do a few test pops to make sure that your OCF can see the flash from your OBF.
Set the optical slave on the LP180 to S1
Finally Step Three!
At this point, you're ready to start shooting. The final trick is to deflect the OBF light away from your subject with whatever flag/card/reflector you want. You do NOT want the OBF to have any influence on your subject, but you DO need the flash to trigger the optical slave on your OCF.
VERY IMPORTANT: Use your card or flag or whatever to deflect the OBF away from your subject, but toward the optical slave on your OCF.
Front View: Using this grey card to keep the OBF off of my subject, but bouncing it toward the optical slave of my LP180.
From here on out, it's time to have fun! try different light set ups and experiment! These cameras are quite fun on their own, but with this method you can really turn them into a creative tool. Go create!
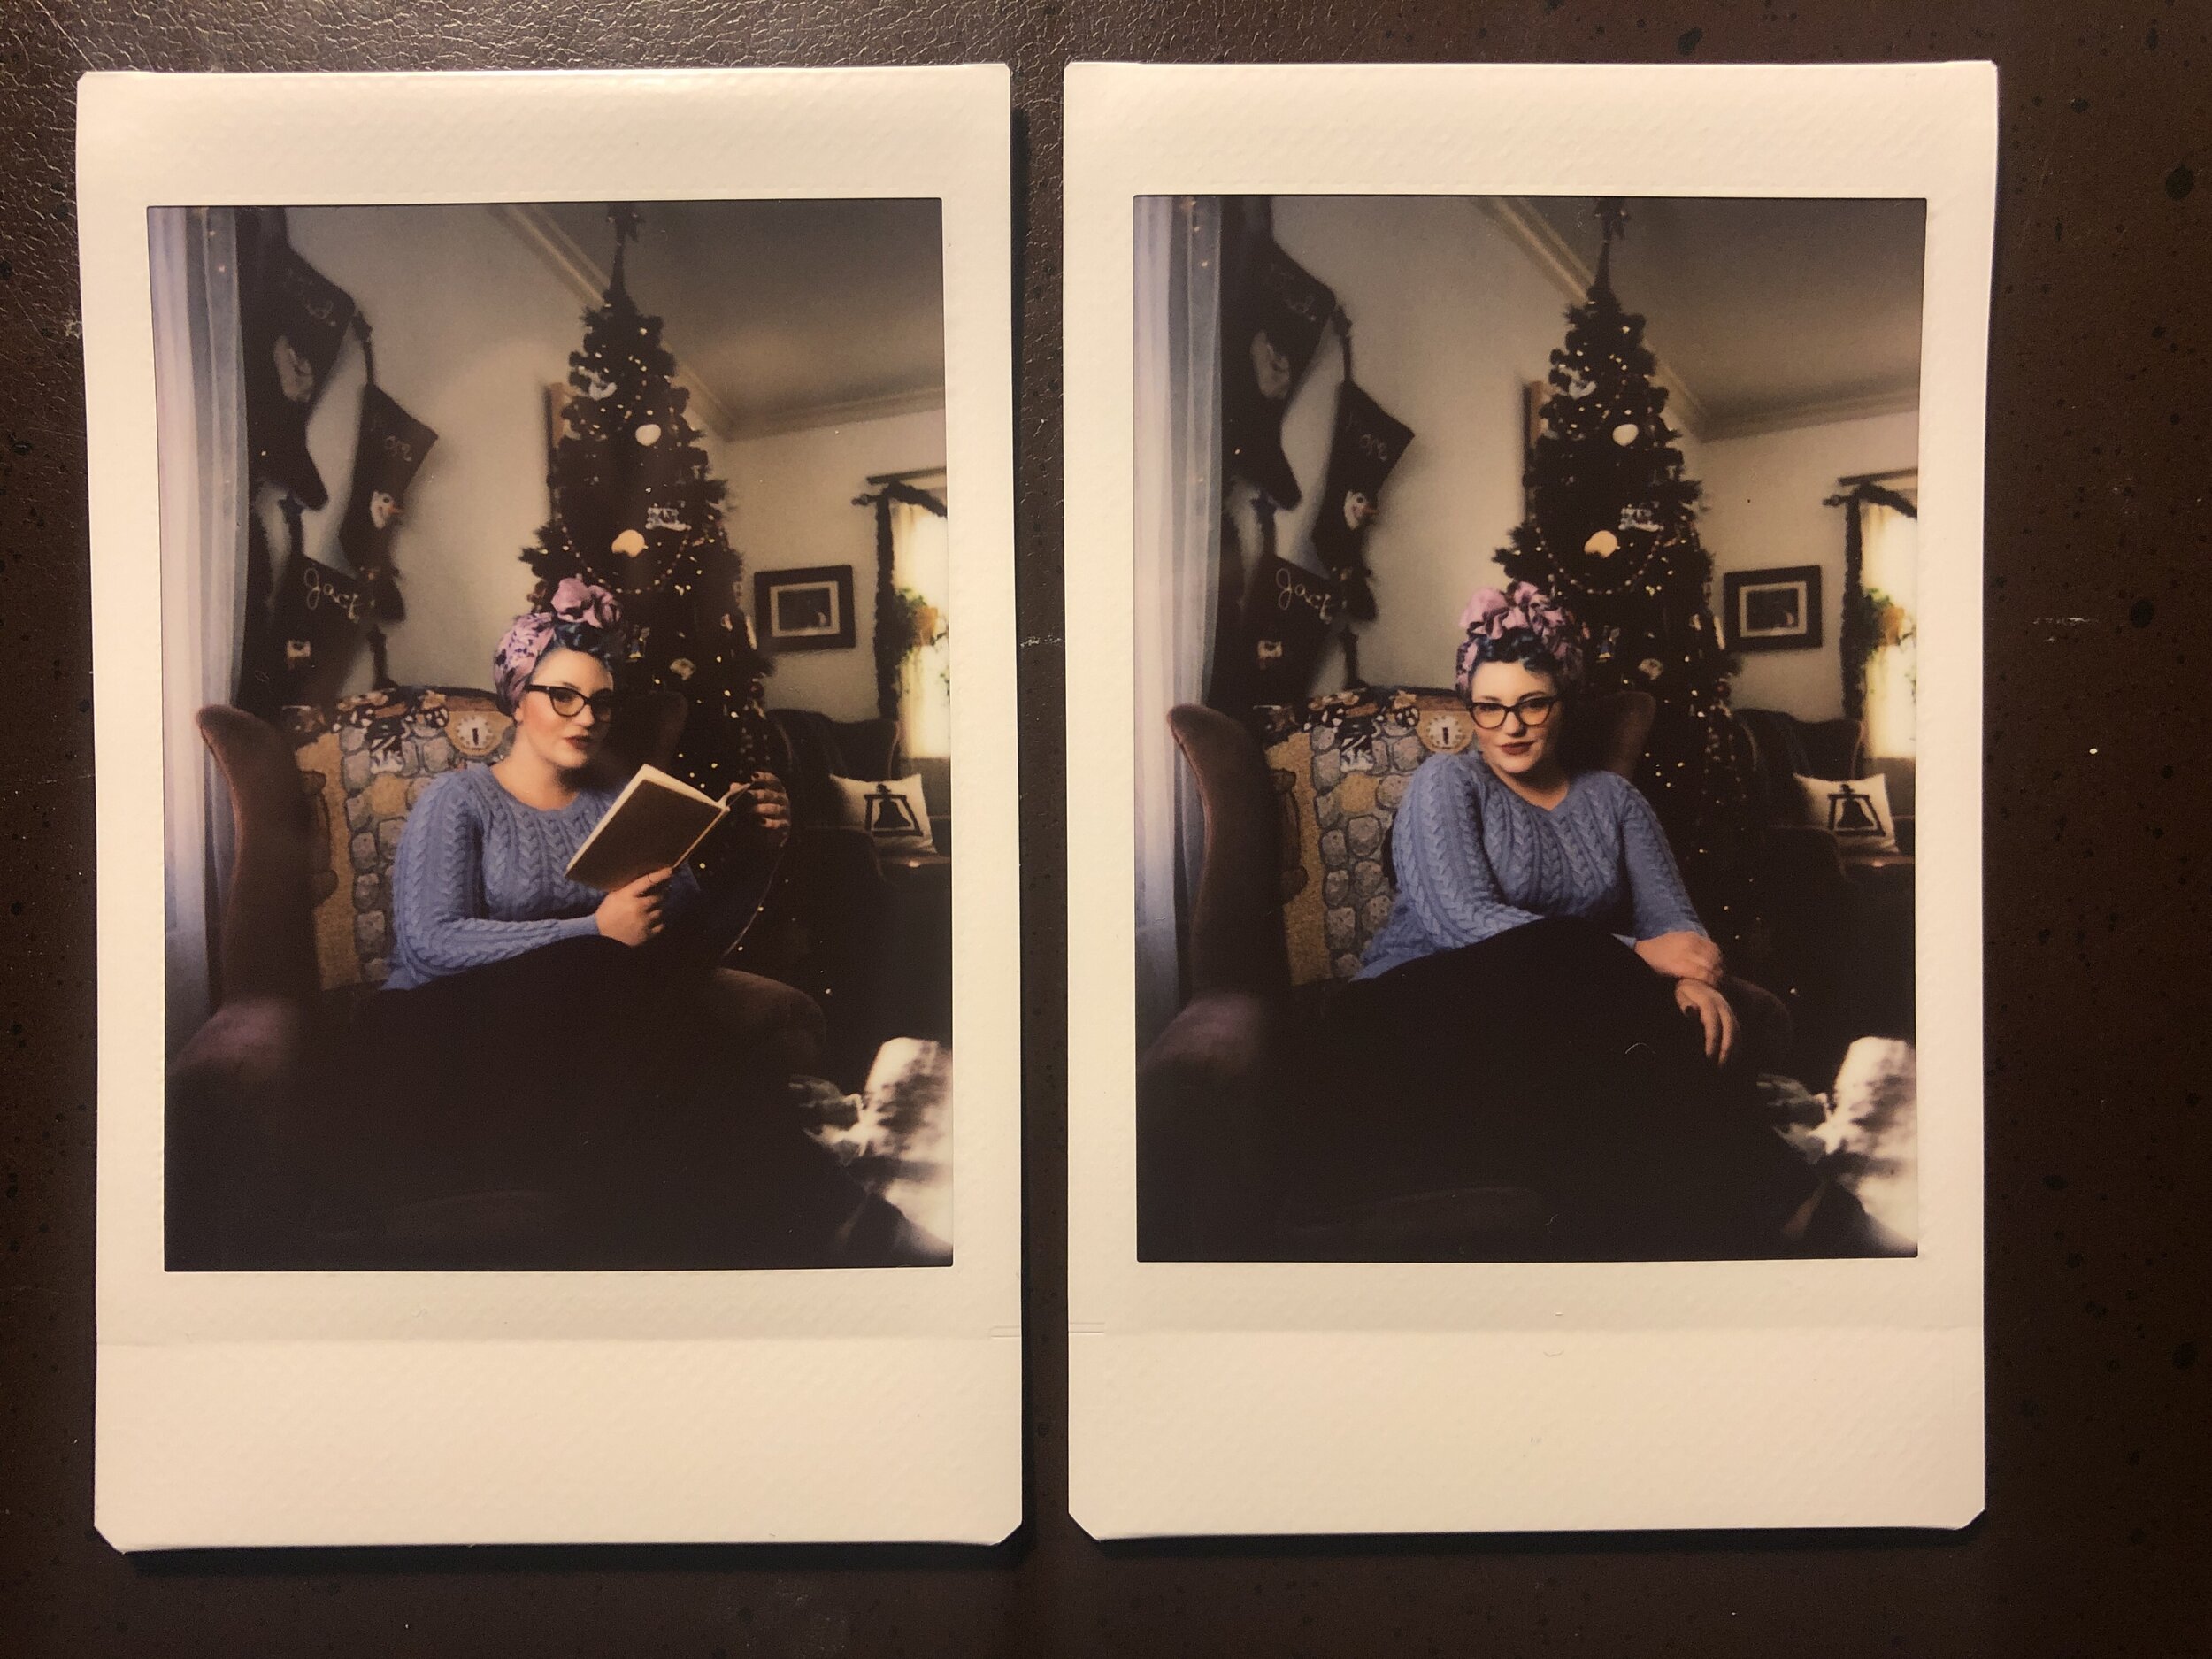
A few test shots using OCF with the Fuji Instax Camera and the LumoPro LP180.